


Building a RAG-Based Application with VectorDB and LLM
Ever wanted to create a custom question-answering app powered by your data, with responses generated using a Large Language Model (LLM)? Welcome to this guide where we’ll walk you through building a Retrieval-Augmented Generation (RAG) app. RAG uses a combination of Vector Database (VectorDB) and LLM, allowing you to answer queries grounded in a unique dataset — all with just a few lines of code!
Imagine an app that can instantly search and respond to customer queries using your own FAQ, help you retrieve specific information from large text corpora, or even build a knowledge base assistant. By the end of this tutorial, you’ll have a simple and effective question-answering interface like this:
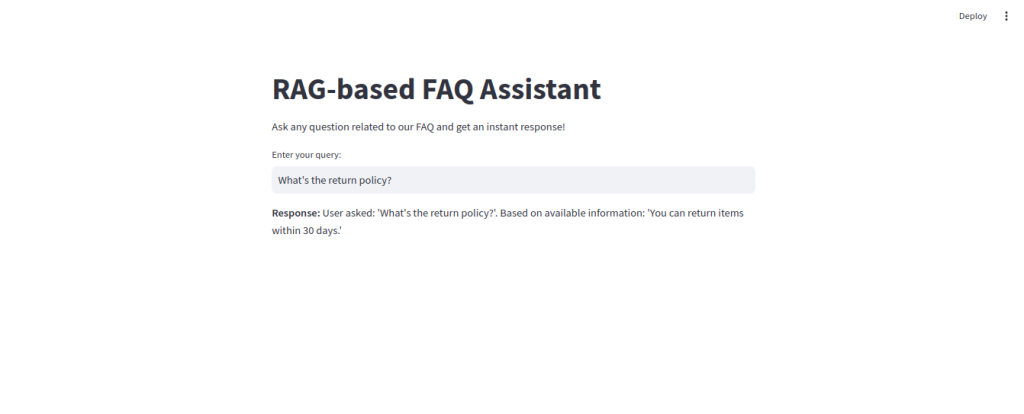
This app will enable users to ask questions and receive instant, relevant responses, all while being powered by your custom data. Let’s dive in and see how it all comes together!
What is RAG, and Why Is It So Powerful?
In essence, RAG combines two key techniques: retrieval and generation. When a user asks a question, instead of generating a response out of thin air, RAG retrieves the most relevant information from a dataset. Then, it generates a response that’s accurate and customized to the question at hand. It’s the best of both worlds, allowing for data-grounded responses that are still naturally generated!
Setting Up the Project Structure
Here’s how we’ll organize our project to keep things modular and manageable:
project-directory/
├── main.py                   # Command-line entry point to load data and handle queries
├── app.py                    # Streamlit-based UI
├── data/
│   └── faq_data.json         # Custom FAQ data file
├── app/
│   ├── __init__.py                # New file to make `app` a package
│   ├── embeddings.py         # Embedding management and upsert to VectorDB
│   ├── settings.py           # Configuration for API keys and environment
│   └── rag_query.py          # Query processing and retrieval logic
Each file has a dedicated role, allowing you to handle different parts of the application independently.
Getting Started: Initial Setup
Before diving into the code, make sure to install the required libraries. We’ll be using pinecone-client and transformers to manage our VectorDB and create embeddings, plus streamlit for the UI.
pip install pinecone-client torch transformers streamlit
Step-by-Step Guide to Building the App
Now, let’s go over each file in the project and see how they work together.
1. settings.py: Configure Your API Keys
This file stores our API credentials and other environment variables, keeping sensitive info separate from code logic. Replace the placeholder values with your actual Pinecone API key and preferred region.
# settings.py
PINECONE_API_KEY = "your-api-key"
PINECONE_ENVIRONMENT = "us-east-1"  # or other Pinecone-supported region
PINECONE_INDEX_NAME = "faq-embeddings"
2. embeddings.py: Managing Embeddings and Data Storage
This file connects our application to Pinecone and sets up an index to store embeddings, which are vector representations of data points.
- Model Initialization: We use the Hugging Face model sentence-transformers/all-MiniLM-L6-v2 to create embeddings.
- Index Creation: If the specified index doesn’t exist in Pinecone, we create it with a dimension of 384 (matching the embedding size) and cosine similarity as the metric.
from pinecone import Pinecone, ServerlessSpec
import torch
from transformers import AutoTokenizer, AutoModel
from .settings import PINECONE_API_KEY, PINECONE_ENVIRONMENT, PINECONE_INDEX_NAME

pinecone = Pinecone(api_key=PINECONE_API_KEY)

if PINECONE_INDEX_NAME not in pinecone.list_indexes().names():
    pinecone.create_index(
        name=PINECONE_INDEX_NAME,
        dimension=384,
        metric='cosine',
        spec=ServerlessSpec(cloud='aws', region=PINECONE_ENVIRONMENT)
    )

index = pinecone.Index(PINECONE_INDEX_NAME)

tokenizer = AutoTokenizer.from_pretrained("sentence-transformers/all-MiniLM-L6-v2")
model = AutoModel.from_pretrained("sentence-transformers/all-MiniLM-L6-v2")

def create_embedding(text):
    inputs = tokenizer(text, return_tensors="pt", padding=True, truncation=True, max_length=128)
    with torch.no_grad():
        embeddings = model(**inputs).last_hidden_state.mean(dim=1)
    return embeddings.numpy().tolist()[0]

def upsert_data(data):
    for item in data:
        question_embedding = create_embedding(item["question"])
        index.upsert([(item["question"], question_embedding, {"answer": item["answer"]})])
3. faq_data.json: Custom Data for Retrieval
This JSON file contains common questions and their answers, which the app will retrieve and use to respond to user queries.
[
    {"question": "What is the return policy?", "answer": "You can return items within 30 days."},
    {"question": "How to track my order?", "answer": "Use the tracking link sent to your email."},
    {"question": "Can I cancel my order?", "answer": "Yes, within 24 hours of placing the order."}
]
4. rag_query.py: Query Processing
This module processes user queries by embedding the question and searching for similar items in the database.
from .embeddings import create_embedding, index

def rag_query(user_query):
    query_embedding = create_embedding(user_query)
    result = index.query(vector=query_embedding, top_k=1, include_metadata=True)

    if result['matches']:
        closest_match = result['matches'][0]
        faq_answer = closest_match['metadata']['answer']
    else:
        faq_answer = "I'm sorry, I don't have information on that."

    response = f"User asked: '{user_query}'. Based on available information: '{faq_answer}'"
    return response
5. main.py: Command-Line Interface
This is the command-line entry point of the application. It loads data from the faq_data.json file, upserts it into the database, and processes user queries.
import json
from app.embeddings import upsert_data
from app.rag_query import rag_query

def load_data():
    with open("data/faq_data.json", "r") as file:
        faq_data = json.load(file)
        upsert_data(faq_data)

if __name__ == "__main__":
    load_data()  # Load data only once at startup
    user_query = input("Enter your query: ")
    response = rag_query(user_query)
    print("Response:", response)
Adding a User Interface with Streamlit
Now let’s take things up a notch and add a user-friendly interface with Streamlit. Streamlit is a Python library that turns scripts into shareable web apps — perfect for building an interactive FAQ assistant!
Create app.py for the UI
In the main project directory, create a new file called app.py. This file will use Streamlit to set up a simple web interface.
# app.py
import streamlit as st
from app.embeddings import upsert_data
from app.rag_query import rag_query
import json

# Load data into VectorDB (only once)
@st.cache_resource
def initialize_data():
    with open("data/faq_data.json", "r") as file:
        faq_data = json.load(file)
        upsert_data(faq_data)

initialize_data()

# Streamlit UI
st.title("RAG-based FAQ Assistant")
st.write("Ask any question related to our FAQ and get an instant response!")

# User input
user_query = st.text_input("Enter your query:")

if user_query:
    # Fetch response from rag_query function
    response = rag_query(user_query)
    st.write("**Response:**", response)
Explanation of app.py
- Data Initialization: initialize_data loads and upserts our FAQ data into Pinecone. Using @st.cache_resource ensures that data loading occurs only once, improving performance.
- User Query Input: st.text_input provides a text box for users to enter their queries.
- Display Response: When a user submits a query, the app uses rag_query to get the best answer and displays it.
Running the Streamlit App
To start the Streamlit app, enter the following command:
streamlit run app.pyThis will launch a local web server, and you’ll be able to interact with the FAQ assistant through a web interface. Type in your questions and watch the assistant respond instantly!
Wrapping Up
Congratulations! You’ve built a RAG-based FAQ assistant that combines custom data with a powerful language model to deliver responses via a friendly user interface. Now, you have two options to interact with the app:
- Command Line: Run python main.py for a CLI-based experience.
- Web UI: Use streamlit run app.py to launch a Streamlit interface.
This project gives you a taste of the incredible potential of Retrieval-Augmented Generation (RAG). By combining the strength of VectorDB with LLMs, you’ve created a versatile tool that can find relevant information and answer questions based on your unique knowledge base.
With your newfound knowledge, imagine the possibilities — from personal knowledge assistants to customer service tools! Well done, and happy building!
Need expert help with your AI application? Let’s collaborate to create something extraordinary. Start your AI journey with us!