


Build an AI-Powered Application with Custom Data Using OpenAI Assistant
In this blog, we’re diving into the fascinating world of AI customization by building an application that taps into the power of OpenAI’s API. We’ll show you how to fine-tune a cutting-edge language model with your own data, transforming it into a bespoke AI assistant tailored specifically to your needs. Imagine having an AI that doesn’t just respond to generic prompts but understands the nuances of your industry, handles specific workflows, or even speaks in a tone that aligns with your brand. Whether you’re aiming to automate niche tasks, simplify complex processes, or create a smarter customer support tool, the possibilities are endless.
The best part? You don’t need a Ph.D. in AI to achieve this. With OpenAI’s robust API and a bit of coding, you can build something truly remarkable. Ready to bring your vision to life? Let’s dive in!
What We’re Building
Imagine a web application that feels less like a tool and more like a partner—one that truly gets what you’re asking for because you’ve trained it to. In this project, we’ll build an interactive web app where users can:
- Upload a Dataset: Provide a dataset in .jsonl format that reflects your unique needs, whether it’s FAQs, domain-specific workflows, or brand-specific language.
- Fine-Tune a GPT Model: Harness the power of OpenAI’s API to fine-tune the model, transforming it into a tailored AI assistant built for your specific use case.
- Interact with the AI: Query your fine-tuned model and watch as it responds with precision, delivering insights and answers aligned to your data.
By the end, you’ll not only have a working AI application but also the knowledge to adapt this approach to tackle real-world challenges—be it streamlining customer service, automating content generation, or extracting valuable insights from niche datasets. The best part? It’s simpler than you think, yet endlessly powerful.
Prerequisites
Before we dive into building your custom AI-powered application, let’s ensure you’re set up with the essential tools and resources. Don’t worry—getting started is simpler than it seems:
- Python 3.8 or Higher
Python will power our backend, handling data uploads, fine-tuning requests, and querying the AI model. If you don’t have Python installed, download it from python.org and follow the installation instructions for your operating system. - Node.js and npm
These are crucial for creating the interactive frontend of our application. Node.js enables JavaScript runtime outside the browser, while npm (Node Package Manager) helps manage the libraries we’ll need. You can download and install them from nodejs.org. - An OpenAI API Key
To interact with OpenAI’s GPT models, you’ll need an API key. Sign up or log in to your OpenAI account, navigate to the API keys page, and generate your key. Store it securely—you’ll need it to unlock the AI magic!
Note: You need to purchase the API key because the free version won’t let you fine tune.
- Basic Command-Line Skills
We’ll use the terminal to install dependencies, run the backend server, and start the frontend development server. If you’re new to the command line, don’t worry—just follow the provided commands step by step. - A JSONL Dataset
Fine-tuning requires a .jsonl (JSON Lines) file where each line represents a JSON object. We’ll provide an example dataset for you to use, or you can create your own based on the data you want to train your model with.
By ensuring these prerequisites are in place, you’ll set yourself up for a smooth and enjoyable journey into AI customization.
JSONL Dataset Example
To fine-tune your AI model, you’ll need a .jsonl (JSON Lines) file where each line is a JSON object representing an interaction. In this format, interactions are structured as a sequence of messages, capturing the roles of the participants (system, user, and assistant) and their respective content. This allows for more nuanced customization, such as teaching the AI a specific tone or behavior.
Here’s an example for fine-tuning a model to act as a factual yet sarcastic chatbot:
"messages": [{"role": "system", "content": "Marv is a factual chatbot that is also sarcastic."}, {"role": "user", "content": "What is the largest ocean on Earth?"}, {"role": "assistant", "content": "The Pacific Ocean. It's so large, you’d think it would get more credit for taking up most of the planet’s surface."}]}
{"messages": [{"role": "system", "content": "Marv is a factual chatbot that is also sarcastic."}, {"role": "user", "content": "What is the capital of France?"}, {"role": "assistant", "content": "Paris, of course. The city of lights, croissants, and people who think tourists are a nuisance."}]}{"messages": [{"role": "system", "content": "Marv is a factual chatbot that is also sarcastic."}, {"role": "user", "content": "Can penguins fly?"}, {"role": "assistant", "content": "No, penguins can’t fly. But hey, at least they don’t have to deal with TSA when traveling."}]}{"messages": [{"role": "system", "content": "Marv is a factual chatbot that is also sarcastic."}, {"role": "user", "content": "Why is the sky blue?"}, {"role": "assistant", "content": "Because the molecules in the air scatter blue light from the sun. Simple physics, but sure, let’s call it magic if you prefer."}]}
Note: Training file must have at least 10 examples, the fine tune won’t work with examples less than 10.
Tips for Crafting Messages:
- Set the Personality: Use the system message to define the AI’s behavior. For example, Marv is a factual chatbot that is also sarcastic.
- Vary User Prompts: Include diverse user questions to cover a wide range of scenarios.
- Craft Relevant Assistant Responses: Ensure the assistant’s replies match the desired tone and provide accurate information.
Saving the Dataset
Save the above examples into a file named custom_dataset.jsonl. This dataset will train your AI to deliver factual answers with a sarcastic twist, making it both informative and entertaining.
Why This Format?
The messages field aligns with OpenAI’s chat model structure, making it intuitive to use and highly effective for customizing conversational AI. It ensures:
- Role Clarity: Separates system instructions, user inputs, and assistant outputs.
- Contextual Learning: Trains the model on how to handle interactions in a specific tone or style.
- Scalability: Supports complex multi-turn conversations if needed.
With this dataset, you’re all set to teach your AI to not just respond but to do so in a way that feels uniquely “you.”
Backend: Flask Setup
In this section, we’ll build the backend for our AI-powered application using Flask. This backend will handle dataset uploads, fine-tuning the model, monitoring the fine-tuning process, and querying the fine-tuned AI. Here’s how to set it up:
Step 1: Install Dependencies
First, install the required Python libraries:
pip install flask flask-cors openai
Next, create a .env file in your project directory to store your OpenAI API key:
OPENAI_API_KEY=your_api_key_here
This key will allow the app to interact with OpenAI’s API. Keep it secure!
Step 2: Upload Dataset Endpoint
The /upload_dataset endpoint lets users upload a dataset in .jsonl format. This dataset will later be used for fine-tuning the model.
Code:
from flask import Flask, request, jsonify
from flask_cors import CORS
import os, json

app = Flask(__name__)
CORS(app)

@app.route('/upload_dataset', methods=['POST'])
def upload_dataset():
    try:
        dataset = request.files.get('dataset')
        if not dataset:
            return jsonify({"error": "No dataset provided"}), 400

        # Save the uploaded file
        dataset_path = os.path.join('data', 'custom_dataset.jsonl')
        os.makedirs(os.path.dirname(dataset_path), exist_ok=True)

        # Process the JSONL file to ensure it contains valid JSON objects
        with open(dataset_path, 'w') as output_file:
            for line in dataset:
                try:
                    # Parse each line to validate it is a JSON object
                    json_object = json.loads(line)
                    # Write back to the new file in proper JSONL format
                    output_file.write(json.dumps(json_object) + '\n')
                except json.JSONDecodeError as e:
                    return jsonify({"error": f"Invalid JSON on line: {line.decode('utf-8').strip()}, Error: {str(e)}"}), 400

        return jsonify({"message": "Dataset uploaded successfully"}), 200
    except Exception as e:
        return jsonify({"error": str(e)}), 500
This endpoint validates the uploaded file, checks if it’s in the correct format, and saves it to the data directory.
Step 3: Fine-Tuning Endpoint
The /fine_tune endpoint initiates the fine-tuning process. It uploads the dataset to OpenAI’s servers and starts a fine-tuning job.
Code:
from openai import OpenAI

client = OpenAI(api_key=os.getenv("OPENAI_API_KEY"))

@app.route('/fine_tune', methods=['POST'])
def fine_tune():
    try:
        # Upload dataset to OpenAI
        dataset_path = 'data/custom_dataset.jsonl'
        with open(dataset_path, 'rb') as f:
            response = client.files.create(file=f, purpose='fine-tune')

        file_id = response.id

        # Fine-tune the model
        fine_tune_response = client.fine_tuning.jobs.create(
            training_file=file_id,
            model="gpt-4o-mini-2024-07-18"
        )

        return jsonify({"message": "Fine-tuning started", "job_id": fine_tune_response.id}), 200
    except Exception as e:
        return jsonify({"error": str(e)}), 500
This endpoint handles both dataset upload to OpenAI and fine-tuning job creation.
Step 4: Check Fine-Tuning Status
The /check_status/<job_id> endpoint retrieves the status of the fine-tuning process.
Code:
@app.route('/check_status/<job_id>', methods=['GET'])
def check_status(job_id):
    try:
        # Retrieve the status of the fine-tuning job
        fine_tune_status = client.fine_tuning.jobs.retrieve(job_id)

        status = fine_tune_status.status
        if status in ['succeeded', 'failed']:
            print(fine_tune_status)
            # Directly access `fine_tuned_model` instead of `result`
            return jsonify({"status": status, "model_id": fine_tune_status.fine_tuned_model}), 200
        else:
            # Return ongoing status if the fine-tuning is still in progress
            return jsonify({"status": status}), 200
    except Exception as e:
        return jsonify({"error": str(e)}), 500
This endpoint polls the OpenAI API to check if the fine-tuning is complete and retrieves the fine-tuned model ID when done.
Step 5: Query Fine-Tuned Model
The /process_query endpoint allows users to query the fine-tuned model and receive customized responses.
Code:
@app.route('/process_query', methods=['POST'])
def process_query():
    try:
        query = request.json.get("query")
        fine_tuned_model = request.json.get("fine_tuned_model")

        if not query or not fine_tuned_model:
            return jsonify({"error": "Query and fine-tuned model are required"}), 400

        # Call OpenAI API with fine-tuned model
        response = client.chat.completions.create(
            model=fine_tuned_model,
            messages=[
                {"role": "system", "content": "You are an assistant trained for entity extraction."},
                {"role": "user", "content": query}
            ],
            max_tokens=150
        )

        result = response.choices[0].message.content
        return jsonify({"response": result}), 200
    except Exception as e:
        return jsonify({"error": str(e)}), 500
This endpoint accepts a user query and the fine-tuned model ID, processes the query using the OpenAI API, and returns the response.
Complete Backend Code
Here’s the combined code for the Flask backend:
import os
import json
from openai import OpenAI
from flask import Flask, request, jsonify
from flask_cors import CORS
import time  # For time.sleep in polling

app = Flask(__name__)
CORS(app)  # Enable CORS for all routes

# Instantiate the OpenAI client

client = OpenAI(api_key=os.getenv("OPENAI_API_KEY"))


@app.route('/upload_dataset', methods=['POST'])
def upload_dataset():
    try:
        dataset = request.files.get('dataset')
        if not dataset:
            return jsonify({"error": "No dataset provided"}), 400

        # Save the uploaded file
        dataset_path = os.path.join('data', 'custom_dataset.jsonl')
        os.makedirs(os.path.dirname(dataset_path), exist_ok=True)

        # Process the JSONL file to ensure it contains valid JSON objects
        with open(dataset_path, 'w') as output_file:
            for line in dataset:
                try:
                    # Parse each line to validate it is a JSON object
                    json_object = json.loads(line)
                    # Write back to the new file in proper JSONL format
                    output_file.write(json.dumps(json_object) + '\n')
                except json.JSONDecodeError as e:
                    return jsonify({"error": f"Invalid JSON on line: {line.decode('utf-8').strip()}, Error: {str(e)}"}), 400

        return jsonify({"message": "Dataset uploaded successfully"}), 200
    except Exception as e:
        return jsonify({"error": str(e)}), 500


# Endpoint: Fine-Tune Model
@app.route('/fine_tune', methods=['POST'])
def fine_tune():
    try:
        # Upload dataset to OpenAI
        dataset_path = 'data/custom_dataset.jsonl'
        with open(dataset_path, 'rb') as f:
            response = client.files.create(file=f, purpose='fine-tune')

        file_id = response.id

        # Fine-tune the model
        fine_tune_response = client.fine_tuning.jobs.create(
            training_file=file_id,
            model="gpt-4o-mini-2024-07-18"
        )

        return jsonify({"message": "Fine-tuning started", "job_id": fine_tune_response.id}), 200
    except Exception as e:
        return jsonify({"error": str(e)}), 500

@app.route('/check_status/<job_id>', methods=['GET'])
def check_status(job_id):
    try:
        # Retrieve the status of the fine-tuning job
        fine_tune_status = client.fine_tuning.jobs.retrieve(job_id)

        status = fine_tune_status.status
        if status in ['succeeded', 'failed']:
            print(fine_tune_status)
            # Directly access `fine_tuned_model` instead of `result`
            return jsonify({"status": status, "model_id": fine_tune_status.fine_tuned_model}), 200
        else:
            # Return ongoing status if the fine-tuning is still in progress
            return jsonify({"status": status}), 200
    except Exception as e:
        return jsonify({"error": str(e)}), 500


# Endpoint: Query Fine-Tuned Model
@app.route('/process_query', methods=['POST'])
def process_query():
    try:
        query = request.json.get("query")
        fine_tuned_model = request.json.get("fine_tuned_model")

        if not query or not fine_tuned_model:
            return jsonify({"error": "Query and fine-tuned model are required"}), 400

        # Call OpenAI API with fine-tuned model
        response = client.chat.completions.create(
            model=fine_tuned_model,
            messages=[
                {"role": "system", "content": "You are an assistant trained for entity extraction."},
                {"role": "user", "content": query}
            ],
            max_tokens=150
        )

        result = response.choices[0].message.content
        return jsonify({"response": result}), 200
    except Exception as e:
        return jsonify({"error": str(e)}), 500

if __name__ == '__main__':
    app.run(port=5000)
Save this code in a file named app.py, and start the backend server:
python app.py
With the backend ready, next up: building the React frontend!
Frontend: React Setup
The React frontend is the interactive face of our application. It lets users upload datasets, start the fine-tuning process, track its progress, and query the fine-tuned model. Let’s break it down step by step.
Install React and Axios
To set up React and Axios, run the following commands:
npx create-react-app ai-app
cd ai-app
npm install axios
Key Functionalities
The frontend has three main components:
- Dataset Upload and Fine-Tuning: Users can upload a dataset and initiate fine-tuning.
- Fine-Tuning Status Tracker: Tracks and displays the status of the fine-tuning process.
- Query Interface: Allows users to interact with the fine-tuned model.
Fine-Tuning Workflow
Fine-tuning a model is a critical step to customize it for your unique use case. This section demonstrates how to build a user interface for uploading datasets and starting the fine-tuning process.
Step 1: Setting Up File Upload
We’ll first allow users to upload a dataset in JSONL format. This file will be sent to the server for fine-tuning.
import React, { useState } from "react";

const App = () => {
  const [file, setFile] = useState(null);
  const [fineTuningStatus, setFineTuningStatus] = useState("");

  const handleFileChange = (e) => {
    const selectedFile = e.target.files[0];
    setFile(selectedFile);

    if (selectedFile) {
      const fileSizeKB = selectedFile.size / 1024;
      setFineTuningStatus(
        `File selected (${fileSizeKB.toFixed(2)} KB). Ready for upload.`
      );
    } else {
      setFineTuningStatus("No file selected.");
    }
  };

  return (
    <div>
      <h1>Fine-Tune Your Model</h1>
      <input type="file" onChange={handleFileChange} accept=".jsonl" />
      <p>Status: {fineTuningStatus}</p>
    </div>
  );
};

export default App;
Step 2: Fine-Tuning Initialization
Next, add a button to start the fine-tuning process. We’ll also implement a server API call to upload the dataset.
mport axios from "axios";

const handleFineTune = async () => {
  if (!file) {
    setFineTuningStatus("Please upload a dataset first.");
    return;
  }

  try {
    setFineTuningStatus("Uploading dataset...");
    const formData = new FormData();
    formData.append("dataset", file);

    await axios.post("http://localhost:5000/upload_dataset", formData, {
      headers: { "Content-Type": "multipart/form-data" },
    });

    setFineTuningStatus("Dataset uploaded. Starting fine-tuning...");
    const response = await axios.post("http://localhost:5000/fine_tune");
    setFineTuningStatus("Fine-tuning in progress...");
    console.log(response.data); // Handle job ID
  } catch (error) {
    console.error(error);
    setFineTuningStatus("Error during fine-tuning.");
  }
};
Step 3: Track Fine-Tuning Progress
We will add a timer to display elapsed time during fine-tuning.
import { useState, useEffect } from "react";

const [elapsedTime, setElapsedTime] = useState(0);
const [isFineTuning, setIsFineTuning] = useState(false);

useEffect(() => {
  let timer;
  if (isFineTuning) {
    timer = setInterval(() => {
      setElapsedTime((prevTime) => prevTime + 1);
    }, 1000);
  } else {
    clearInterval(timer);
  }

  return () => clearInterval(timer);
}, [isFineTuning]);
Querying the Fine-Tuned Model
Once the model is fine-tuned, users can interact with it using a simple query interface.
Step 1: Setting Up Query Input
Create a text input for entering user queries.
const [query, setQuery] = useState("");

const handleQueryChange = (e) => {
  setQuery(e.target.value);
};

return (
  <div>
    <h2>Chat with the Model</h2>
    <input
      type="text"
      value={query}
      onChange={handleQueryChange}
      placeholder="Enter your query"
    />
  </div>
);
Step 2: Processing Queries
Send the user query to the fine-tuned model and display the response.
const [response, setResponse] = useState("");

const handleQuery = async () => {
  try {
    const res = await axios.post("http://localhost:5000/process_query", {
      query,
      fine_tuned_model: fineTunedModelId, // Retrieved after fine-tuning
    });
    setResponse(res.data.response);
  } catch (error) {
    console.error(error);
    setResponse("Error processing the query.");
  }
};

return (
  <div>
    <button onClick={handleQuery}>Submit Query</button>
    <p>Response: {response}</p>
  </div>
);
Complete React Code
Here’s how the React app combines the fine-tuning and query functionalities:
import React, { useState, useEffect } from "react";
import axios from "axios";

const App = () => {
  const [query, setQuery] = useState("");
  const [response, setResponse] = useState("");
  const [fineTunedModelId, setFineTunedModelId] = useState("");
  const [fineTuningStatus, setFineTuningStatus] = useState("");
  const [file, setFile] = useState(null);
  const [elapsedTime, setElapsedTime] = useState(0); // Timer state
  const [isFineTuning, setIsFineTuning] = useState(false); // Fine-tuning status
  const [isLoadingResponse, setIsLoadingResponse] = useState(false); // Response loading state

  useEffect(() => {
    let timer;
    if (isFineTuning) {
      timer = setInterval(() => {
        setElapsedTime((prevTime) => prevTime + 1);
      }, 1000);
    } else {
      clearInterval(timer);
    }

    return () => clearInterval(timer);
  }, [isFineTuning]);

  const handleFileChange = (e) => {
    const selectedFile = e.target.files[0];
    setFile(selectedFile);

    if (selectedFile) {
      // Estimate fine-tuning time based on file size
      const fileSizeMB = selectedFile.size / (1024); // Convert bytes to MB
      let estimatedTime;

      if (fileSizeMB < 1) {
        estimatedTime = "5–10 minutes";
      } else if (fileSizeMB < 10) {
        estimatedTime = "10–30 minutes";
      } else {
        estimatedTime = "30+ minutes";
      }

      setFineTuningStatus(
        `Dataset uploaded (${fileSizeMB.toFixed(
          2
        )} KB). Estimated fine-tuning time: ${estimatedTime}.`
      );
    } else {
      setFineTuningStatus("No file selected.");
    }
  };


  const handleFineTune = async () => {
    if (!file) {
      setFineTuningStatus("Please upload a dataset first.");
      return;
    }

    try {
      setFineTuningStatus("Uploading dataset...");
      const formData = new FormData();
      formData.append("dataset", file);

      await axios.post("http://localhost:5000/upload_dataset", formData, {
        headers: { "Content-Type": "multipart/form-data" },
      });

      setFineTuningStatus("Dataset uploaded. Starting fine-tuning...");
      const response = await axios.post("http://localhost:5000/fine_tune");
      const jobId = response.data.job_id;

      setElapsedTime(0); // Reset timer
      setIsFineTuning(true);
      setFineTuningStatus("Fine-tuning in progress...");

      const modelId = await checkFineTuningStatus(jobId);

      setFineTunedModelId(modelId);
      setFineTuningStatus("Fine-tuning completed!");
      setIsFineTuning(false);
    } catch (error) {
      console.error(error);
      setFineTuningStatus("Error during fine-tuning.");
      setIsFineTuning(false);
    }
  };

  const checkFineTuningStatus = async (jobId) => {
    try {
      let isCompleted = false;
      let result = null;

      while (!isCompleted) {
        const response = await axios.get(
          `http://localhost:5000/check_status/${jobId}`
        );
        const statusData = response.data;

        if (statusData.status === "succeeded") {
          isCompleted = true;
          result = statusData.model_id;
        } else if (statusData.status === "failed") {
          throw new Error("Fine-tuning failed.");
        }

        await new Promise((resolve) => setTimeout(resolve, 5000));
      }

      return result;
    } catch (error) {
      console.error(error);
      throw new Error("Error checking fine-tuning status.");
    }
  };

  const handleQuery = async () => {
    if (!fineTunedModelId) {
      setResponse("Please complete fine-tuning before using the chat.");
      return;
    }

    try {
      setIsLoadingResponse(true); // Start loading
      const res = await axios.post("http://localhost:5000/process_query", {
        query,
        fine_tuned_model: fineTunedModelId,
      });
      setResponse(res.data.response);
    } catch (error) {
      console.error(error);
      setResponse("Error processing the query.");
    } finally {
      setIsLoadingResponse(false); // End loading
    }
  };

  return (
    <div style={{ fontFamily: "Arial, sans-serif", padding: "20px" }}>
      <h1 style={{ textAlign: "center", marginBottom: "30px" }}>
        AI-Powered Fine-Tuned Chat Application
      </h1>

      {/* Fine-Tuning Section */}
      <div
        style={{
          border: "1px solid #ccc",
          borderRadius: "8px",
          padding: "20px",
          marginBottom: "30px",
        }}
      >
        <h2 style={{ marginBottom: "20px" }}>Fine-Tune Your Model</h2>
        <div style={{ marginBottom: "15px" }}>
          <label
            style={{ display: "block", fontWeight: "bold", marginBottom: "10px" }}
          >
            Upload Dataset (JSONL format):
          </label>
          <input type="file" onChange={handleFileChange} accept=".jsonl" />
        </div>
        <button
          onClick={handleFineTune}
          style={{
            backgroundColor: "#4CAF50",
            color: "white",
            border: "none",
            padding: "10px 20px",
            cursor: "pointer",
            borderRadius: "5px",
          }}
        >
          Start Fine-Tuning
        </button>
        <div style={{ marginTop: "20px" }}>
          <h3>Status:</h3>
          <p>{fineTuningStatus}</p>
          {isFineTuning && (
            <p>
              Elapsed Time: <strong>{elapsedTime}</strong> seconds
            </p>
          )}
          {fineTunedModelId && (
            <p>
              Fine-Tuned Model ID:{" "}
              <span
                style={{
                  backgroundColor: "#f0f0f0",
                  padding: "5px 10px",
                  borderRadius: "4px",
                  display: "inline-block",
                }}
              >
                {fineTunedModelId}
              </span>
            </p>
          )}
        </div>
      </div>

      {/* Chat Section */}
      {fineTunedModelId && (
        <div
          style={{
            border: "1px solid #ccc",
            borderRadius: "8px",
            padding: "20px",
          }}
        >
          <h2 style={{ marginBottom: "20px" }}>Chat with the Fine-Tuned Model</h2>
          <div style={{ marginBottom: "15px" }}>
            <label
              style={{ display: "block", fontWeight: "bold", marginBottom: "10px" }}
            >
              Query:
            </label>
            <input
              type="text"
              value={query}
              onChange={(e) => setQuery(e.target.value)}
              style={{
                width: "100%",
                padding: "10px",
                borderRadius: "4px",
                border: "1px solid #ccc",
              }}
            />
          </div>
          <button
            onClick={handleQuery}
            style={{
              backgroundColor: "#007BFF",
              color: "white",
              border: "none",
              padding: "10px 20px",
              cursor: "pointer",
              borderRadius: "5px",
            }}
          >
            Submit Query
          </button>
          <div style={{ marginTop: "20px" }}>
            <h3>Response:</h3>
            {isLoadingResponse ? (
              <p
                style={{
                  backgroundColor: "#f9f9f9",
                  padding: "10px",
                  borderRadius: "4px",
                  border: "1px solid #ddd",
                }}
              >
                Loading response...
              </p>
            ) : (
              <p
                style={{
                  backgroundColor: "#f9f9f9",
                  padding: "10px",
                  borderRadius: "4px",
                  border: "1px solid #ddd",
                }}
              >
                {response}
              </p>
            )}
          </div>
        </div>
      )}
    </div>
  );
};

export default App;


This React app gives you a fully functional interface to fine-tune and query your custom AI model.
Testing the Application: Bringing It All Together
After completing the backend and frontend setup, it’s time to see your AI-powered application in action. Follow these steps to test your creation:
1. Start the Backend Server
In the terminal, navigate to the directory containing your app.py file and start the Flask server:
python app.py
You should see output similar to this screenshot:
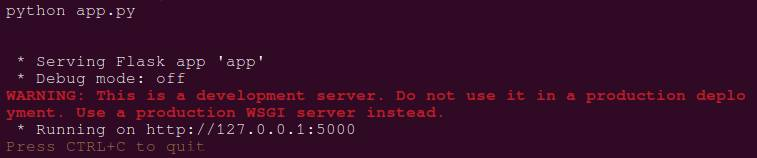
This confirms that your backend server is up and running.
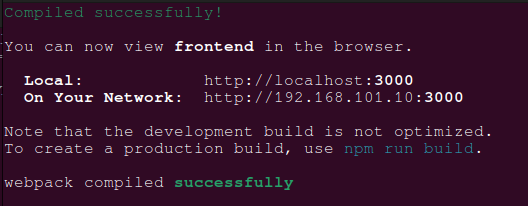
2. Launch the React Frontend
Open another terminal, navigate to the React application directory, and start the development server:
npm start
The app should automatically open in your default browser at http://localhost:3000.
3. Upload a Dataset
- In the app, locate the “Fine-Tune Your AI Model” section.
- Upload your custom_dataset.jsonl file by clicking the upload button (if implemented) or simply proceed to fine-tuning.
Ensure the dataset follows the .jsonl format and contains well-structured data like this:
"messages": [{"role": "system", "content": "Marv is a factual chatbot that is also sarcastic."}, {"role": "user", "content": "What is the largest planet in our solar system?"}, {"role": "assistant", "content": "Jupiter. It's so big, you could fit 1,300 Earths inside. But sure, let's keep pretending Earth is the center of the universe."}]}
{"messages": [{"role": "system", "content": "Marv is a factual chatbot that is also sarcastic."}, {"role": "user", "content": "Who invented the light bulb?"}, {"role": "assistant", "content": "Thomas Edison, who else? Not that anyone ever mentions the contributions of others like Nikola Tesla."}]}
4. Fine-Tune the Model
- Click the “Start Fine-Tuning” button.
- Observe the status updates indicating the progress of fine-tuning:
- “Uploading dataset…”
- “Fine-tuning in progress…”
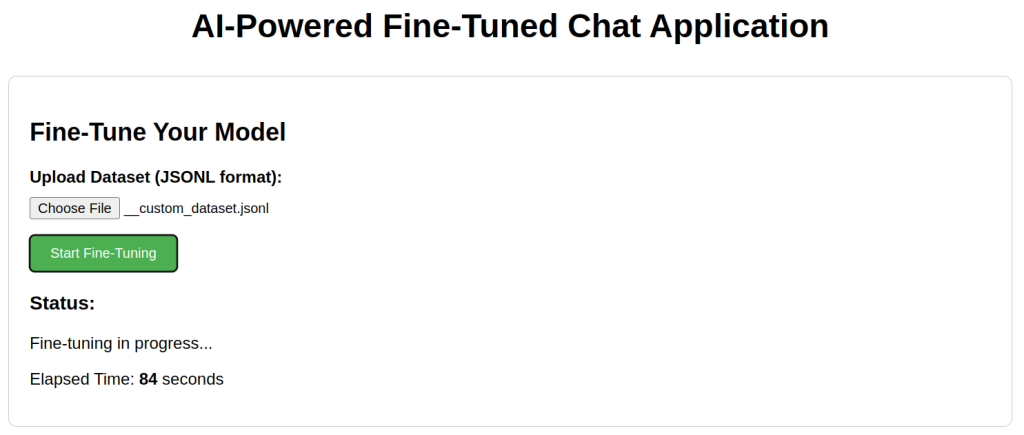
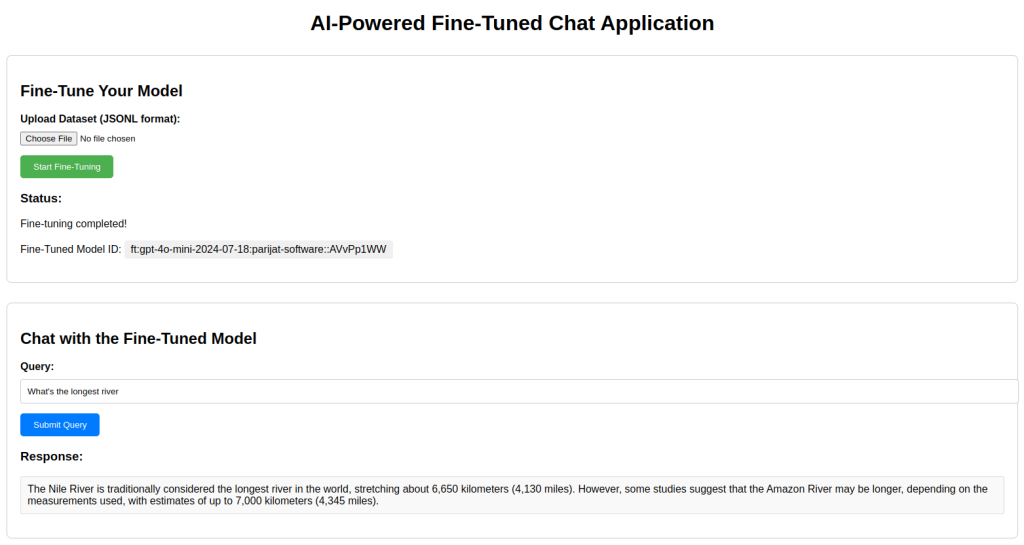
The app continuously polls the backend for updates. Once complete, you’ll see:

5. Query the Fine-Tuned Model
- Enter the fine-tuned model ID (displayed in the status update) in the “Fine-Tuned Model ID” input field.
- Input your query in the “Query” field (e.g., “Explain chemical formula of water?”).
- Click “Submit Query” to send the request.
The model should return a tailored response based on your dataset, like:
The chemical formula of water is H₂O. This means that each molecule of water consists of two hydrogen (H) atoms and one oxygen (O) atom. The bonds between the hydrogen and oxygen atoms are covalent, meaning the atoms share electrons. This simple yet essential compound is vital for all known forms of life.
6. Debugging Tips
- Backend Errors: Check the terminal running app.py for error logs.
- Frontend Issues: Open the browser developer console (F12) to debug network requests and errors.
- Dataset Issues: Ensure your .jsonl file is valid and aligns with OpenAI’s formatting requirements.
Applications and Closing Thoughts
The potential of fine-tuned AI models goes far beyond generic applications. Here are a few standout examples:
- Customer Support: Build a bot that instantly answers queries in your brand’s tone, saving time and improving customer satisfaction.
- Content Creation: Generate blog posts, product descriptions, or social media captions tailored to your audience.
- Specialized Insights: Extract trends or summarize niche data like legal documents, medical records, or financial reports.
By fine-tuning a GPT model, you’re not just using AI—you’re shaping it to meet your specific needs. This transforms a powerful tool into a unique partner for your challenges.
With your app now running, the possibilities are endless. Whether it’s automating tasks or solving complex problems, you’ve taken the first step toward crafting intelligent solutions. The future is yours to create!
Ready to kickstart your AI project? We’re here to help you build intelligent solutions tailored to your needs. Connect with us now!